adsense account approval trick by youtube partnership

AdSense in some countries is slightly difficult to get. Many of the publishers says the best way to get an adsense account is through blog, but its not so easy to get an approved account with a six month old 25+ post blog with decent traffic.

Another way to get approval easily is through youtube, as you can see its worked for me. Remember a disapproved account should not be associated with that gmail account from which your youtube acc. has been created.
Just have a youtube account, create a channel in it and upoad atleast 10+ videos. These videos should not receive copyright notice from youtube (read youtube terms and conditions for monetization).
Now wait for some decent traffic, this should be with natural searches and not from referrals. It will be better if your channel is 6 months old.
Than apply for monetization from youtube settings. Click on 'Enable my Account'

Now your youtube account will be monetized

Remember till now you have not applied for adsense, but now its time for it. When a youtube is enabled for monetization how will they pay to you, its through adsense.
Now apply for adsense using youtube as shown below.


Try it with patience and enjoy.......

If you want an already approved account faster than I can help you out for getting this approved click here

Please comment and like us if this helped you.

Top most Google Adsense alternatives for Indian publishers

If you want to make money online there is no better option than Google Adsense. However, thankfully Adsense is not the only option available for Indian publishers. In case you have not yet applied for Google Adsense or your application was rejected or you wish to explore more revenue models and earn check out the list of ad-networks that works well for Indian publishers.
Though all the ad networks listed below are safe to use along with AdSense it is advisable to cross check and be sure that the Adsense term and condition are not breached. From my experience Google Adsense will earn you more money that other affiliate / ad networks but by combining certain networks you can make the most out of it without affecting the AdSense income.
However these alternatives will only work for you if have heavy traffic on your site.

Tribal Fusion
Tribal Fusion is probably the best paying ad network and works well even for Indian Publishers. Having said you need a lot of traffic on your site. Tribal Fusion has updated their minimum site requirement which states that you need 500,000 unique visitors per month that amounts to about 15,000 hits daily.
If you have that much traffic you can earn more by carefully placing the Tribal ads with AdSense and in this process earn more without affecting the AdSense income. Minimum payout is $50.
Apply of Tribal Fusion. 

Technorathi Media

I have used Technorathi Media and it works best if you are getting US / UK traffic. Technorathi even works for Indian visitors but it is not that impressive. The application process is simple and it is relatively easier to get into as a publisher, make sure you have good content and decent traffic about 2000 + daily visitors. Minimum payment amount is $50.
Indian Publisher Submit your application to Technorathi Media. 

Infolinks

Many Indian publishers are already aware of this Infolinks ad network which makes use of in-text ads. All you need to do is add the Infolinks code in your HTML file and related keywords automatically get linked and when visitors move the mouse over these links they see a box with the ads in it.
Infolinks does work and is a good combination with Adsense.  Minimum payment threshold is $50.
Join Infolinks.

Chitika

This is another ad network that Indian publisher would love to add. The minimum payout is $10 via PayPal and $50 by cheque. Again you can make a decent amount of income if you have more of USA / UK visitors. Though the Chitika ad may look a bit similar to AdSense they are not contextual ads and can be safely used along with Adsense.
Apply to Chitika Ad network.
There are the 4 best ad networks that can be used with Adsense or as an alternative to AdSense. There are many other networks in the Indian market but they are not that impressive. AdBrite is also a well known network which has worked for some but it does not work for Indian visitors.

Ways to get an approved adsense account using adsense associations

1). Approve Google Adsense using Blogger

 Here is the first way and many of the blogger use this way to be Google Adsense publisher. As blogger I know this is very boring way , but I will tell you this is mainly preferred way to be Google Adsense publisher. I also approve my Google Adsense account using this way. So you might be thinks of what needs to approve Google Adsense using this way, which listed below :
  • For this way you need one blog in any platform (prefer Blogger).
  • Blog will be active mean daily or weekly updated.
  • Content on blog must be original content not copied .
  • At lease there should be 50-60 post with original content mentioned above.
So these much is enough to apply for Google Adsense. By this way you not have to share any of the revenue which you get from Google Adsense. If your blog contain these much information then Google have not any single chance to reject your blog.


2). Approve Google Adsense using Youtube

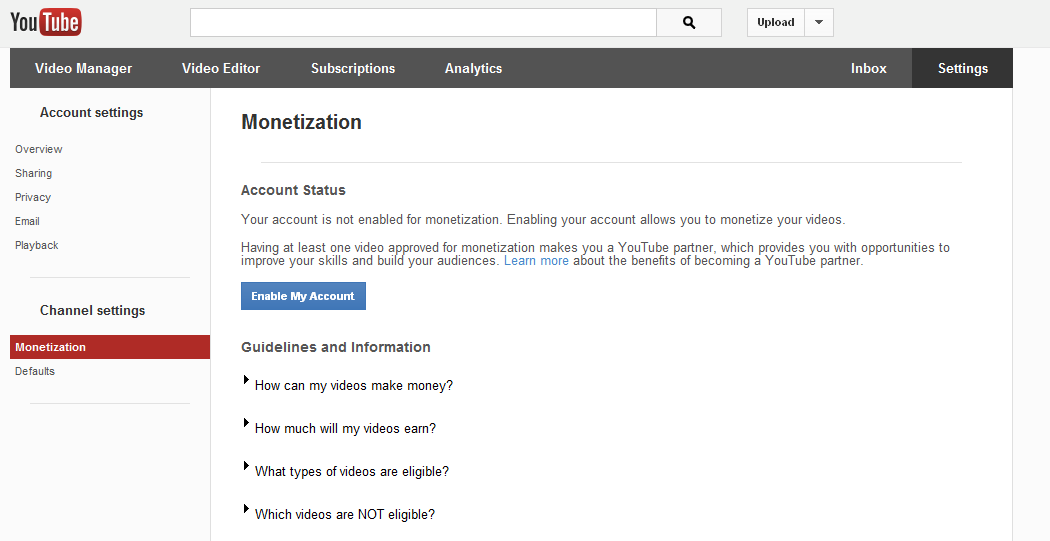
Here is the another and in my opinion the best way for once disapproved publishers. Youtube made a lot easy to get an Adsense account for any youtube partner. You just need to create a youtube channel, upload some vedios and wait for some regular traffic on it here you don't need imense traffic to get approved for monetization. Than apply for monetize your channel using the steps shown in below link.

3). Be Google Adsense Publisher using Bukisa

Approve Google Adsense using Bukisa, Bukisa knowledge sharing website, Google Adsnse and Bukisa
Bukisa is US base website which focus on knowledge base content spreading. On that website you have to write content and share that content on internet. Bukisa having partnership with Google Adsense or using Google Adsense api they helps you to approve your Google Adsense account using their program. for that you need listed below requirements :

  • Having a account in Bukisa.com.
  • Fill up your right detains in profile page.
  • At least 15-20 original content article.
It's enough to apply for Google Adsense using Bukisa.com . After you having your Google Adsense your Google Ads be shown on article that you wrote on Bukisa and for that you have to share 40% of Adsense revenue with Bukisa. None of the people want to share him/her revenue with anybody then it's not necessary to share Google Adsense with Bukisa after getting approve by Google Adsense just revoke access to Bukisa from Adsense account.

4). Approve Google Adsense Account using Hubpages

Hubpages.com, Google Adsense using Hubpages , Approve Google Adsense from Hubpages
Hubpages also having partnership with Google Adsense or using Google Adsense apis they helps you to approve your Google Adsense account. listed below things you need before apply for Google Adsense using Hubpages :

  • Sign Up with Hubpages with your right details.
  • Write 20-25 hubs (Articles) which having original content.
If you will have these much things then now you can apple for Google Adsense account using Hubpages. Here again same things will happen you can put your Google Adsense ads on your hubs and Hubpages take some of the revenue that you earn via that hubs. So same as I mention above you can revoke access of Google Adsense account.

These are the ways for approve adsense using content writing. From this three according to me first one way is most prefer one. But most of the people are familiar with these ways because content writing is very boring way as I mentioned above. So here are some othe ways which helps to Approve your Google Adsense Account.

5). Get Approve for Google Adsense using Docstoc

Docstoc.com, Google Adsense using Docstoc, Approve Google Adsense using Docstoc, Approve Google Adsense using Doccash
Docstoc is document and presentation sharing website which helps you for becoming Google Adsenes Publisher at anywhere. Requirements for this way are mention below :
  • Having one account in Docstoc.
  • Daily upload 2-3 document and be active till your account not have around 40 documents, and one more thing your document or presentation not be copyrighted material.
After fulfill these requirements you can now apply for Google Adsense account from Docstoc. Just apply for Google Adsense using Docstoc go to your profile page and you will get Doccash fill up the details and now wait for Google Adsense reply. After getting Google Adsense account you not want to share your revenue then you just revoke access to Docstoc for Adsense.

6). Approve Google Adsense using Indyarocks

Indyarocks.com, Approve Google Adsense using Indyarocks, Indyarocks and Google Adsense
Indyarocs is social networking website which also provides support to earn revenue with Google Adsense and approve your Adsense account. For that you need these much things :
  • Sign up with Indyarocks.
  • Update 90% of your Indyarocks profile.
  • Upload 10 Good photos to your Indyarocks account.
  • Write 2 Blogs which contains 250 words and not contains ways to earn online stuff and duplicate content.
So it's enough to apply for Google Adsense using Indyarocks and while appling for Google Adsense from Indyarocks use your gmail id at submission time. Again same you not want to share your revenue with Indyarocks after approved by Adsense you revoke access to Indyarocks.

7). Apply for Google Adsense using Flixya

Flixya.com, Google Adsense using Flixya, Approve Google Adsense using Flixya.com
Flixya is again one social networking website which helps to get approve from Google Adsense. Increase your chances to approve by Google Adsense via Flixya follow this steps mentioned below :

  • Having a account of Flixya.
  • Upload your 10-20 photo which you captured using your camera or mobile phones
  • Upload 5-10 videos that you captured using digicam or mobiles.
  • Write 5-10 articles which not be copied one from other sites.

If you follow these much steps your chances to get approve by Google Adsense increases. Again same thing if you not want to share revenue with Flixya revoke access to Flixya for your account.

What are meta keywords? What is the meta keywords tag?

Meta keywords are the list of keywords used to indicate what your web page is about. Used in SEO but no longer being used by Google searching algorithm and also by other major search engines.

Though meta keywords tags are not a major factor search engines consider when ranking sites, they should not be left off the page as they are still helpful and has little value.

Unfortunately, so many unscrupulous webmasters have abused the meta keywords tag that search engines have had to de-emphasize their importance. Still, you should not leave the meta keywords tag off your pages.

Also another use for meta keyword is that you can catogerize your pages or posts easily, same as labels can be used.

Meta keywords tags should adhere to the following guidelines: (1) keep your list of keywords or keyword phrases down to 10 - 15 unique words or phrases; (2) separate the words or phrases using a comma (you do not need to leave a space between words separated by commas); (3) do not repeat words or phrases; (4) put your most important word or phrases at the beginning of your list.

This meta tag is usually placed beneath the title and meta description tags in the

<HEAD></HEAD> section of your pages' HTML code, like this:

<HEAD>
<TITLE>your DESCRIPTIVE KEYWORDS title goes here</TITLE>
<META NAME="DESCRIPTION" CONTENT="Your keyword rich marketing sales-pitch meta description goes here">
<META NAME="KEYWORDS" CONTENT="your keywords,go here,separated by a comma,but not a space">
</HEAD>

Blogger vs WordPress which is better for beginners comparison - 2014

Blogger and Wordpress are the best known free blog hosting services.

First of all blogger is ad-free and you can customize CSS in it, which is not so with wordpress freeware platform you have to upgrade it to premium to enable these feartures.

Blogger has integerated adsense feature, customizable html and includes thirdy party scripts, all these things cannot be done with wordpress.

Both have built-in visitors stats and, blogger supports 50+ languages while wp supports 120+ languages.
Also wp is more secured than blogger, as you can enable password protection for every post in wp.

Search Engine Optimization

If you ask 10 people about which blog platform performs better with regards to SEO 9 out of 10 people would say WordPress. While this is true, Blogger is not really in a big disadvantage.
First, Google does not rely heavily in meta tags and keywords anymore.
Second, Google owns Blogger which makes it more easy to distinguish which side you should support. Will Google leave their Blogger program to be dumped by WordPress forever? Of course not, there will be more changes in the future especially if you are within Google’s backyard.

So in my opinion new blogger interface is more search engine  friendly.
Howerver bloggers dynamic views is not so good for search engine optimization.

Free To Use

Blogger is 100% free. Most Internet marketers suggests that you should start blogging with blogspot to familiarize yourself to various aspects like posting, widgets, applications, elements, feeds and many others. Once you learned a lot, you can switch to WordPress anytime through WordPress Import feature.
If you think this way, you will not realize the importance of Blogger as a platform and it will just remain a training ground on your perspectives. As a free platform, Blogger is totally easy to use to all novice and first time users. But unlike self-hosted WordPress, it highly requires technical knowledge with regards to hosting, servers and other tools, not to mention the expenditures that you will spend for each set-up.

Blogger Pros

Free
Reliable (unlikely to be hacked, virtually no downtime)
Easy-to-use for beginners
Decent selection of templates

Blogger Cons

Limited features (especially comments and the post editor)
You can easily lose your template customizations.
No premium frameworks
Google is free to use and distribute your content.
Self-Hosted

WordPress.org Pros

WordPress software is free.
Extremely flexible & feature rich
Highly customizable (especially with web design/development knowledge)
Easy-to-use without coding knowledge
Wide-variety of free and premium themes
Can use premium frameworks like Genesis
You own your content. No fine print.

WordPress Cons

Requires paid web hosting and a domain name
Some web hosts are unreliable.
Theme customization can be difficult for beginners.
Can be easier to hack than Blogspot blogs

SEO Tip: Use blogger post labels as meta keywords


This is the only way to use labels as meta keywords..
Here is the code to do it.. which you should place instead of the Head tag..!

The Code is commented and it also outputs the Title and Meta Description tags(using Post title) for your convenience..

<!--::::::::::: Block1: Output post meta keywords -->

<b:if cond='data:blog.pageType == &quot;item&quot;'>

   <b:section id='meta1' showaddelement='no'>

   <!-- widget must be a of Type = 'blog' to have posts data exposed, and must have a unique id -->

   <!-- Empty Includables(functions) to output nothing, You must keep them ): -->

   <b:widget id='Blog2' locked='no' type='Blog'>

      <b:includable id='nextprev'/>

      <b:includable id='backlinks' var='post'/>

      <b:includable id='post' var='post' />

      <b:includable id='status-message'/>

      <b:includable id='comment-form' var='post'/>

      <b:includable id='backlinkDeleteIcon' var='backlink'/>

      <b:includable id='postQuickEdit' var='post'/>

      <b:includable id='commentDeleteIcon' var='comment'/>

      <b:includable id='feedLinks'/>

      <b:includable id='feedLinksBody' var='links'/>

      <b:includable id='comments' var='post'/>

      <b:includable id='main' var='top'><!-- Main Function of Any widget comes with ID 'main' -->

         <!-- Loop Page Posts (only 1 in a post page )-->

         <b:loop values='data:posts' var='post'>

            <b:if cond='data:post.labels'>

               <!-- If the post has labels, make Meta keywords by looping lables -->

               &lt;meta name=&quot;keywords&quot; content=&quot;<b:loop values='data:post.labels' var='label'><data:label.name/><b:if cond='data:label.isLast != &quot;true&quot;'>,</b:if></b:loop>&quot; /&gt;

            </b:if>

         </b:loop>

      </b:includable>

   </b:widget>

   </b:section>

</b:if>

<!--::::::::::: Block1 END -->


<head> <!-- THE HEAD -->


<!-- must include(called) here to output other head sub elements -->

<b:include data='blog' name='all-head-content'/>


<!--::::::::::: Block2: Output Index Title,keywords,decription and Post Title,description -->

<!-- Post/Archive Page -->

<b:if cond='data:blog.pageType != &quot;index&quot;'>

   <title><data:blog.pageName/></title>

    <meta name='description' expr:content='data:blog.pageName' />

<!-- Index Page -->  

<b:else/>

   <title><data:blog.pageTitle/></title>

   <meta name='keywords' content='your,blog,keywords!!' />

   <meta name='description' content='your blog description!!' />

</b:if>

<!--::::::::::: Block2 END -->


Some Issues you should be aware of ):

1- XHTML validation will give your warnings about these issues :

Meta Keywords tag Appears before the Head tag.
Why we have to put that code before the head tag? you have to ask ):
well.. You can't place a widget outside of a section, you can't place a section inside head tag. and Post lables must be called inside of 'Blog' widget.
Meta Keywords will be surrounded with Div tags which should not appear there.
why? Cause Widget and sections Tags are auto. converted to div tags by Blogger..!

2- Some Meta tags analyzers will warn you that they don't see meta keywords (Cause it was outside of the head).. But Most search engines would be able to find your meta keywords..
As you can see that's why I'm separating the code into 2 blocks:
first one outside the Head tag to output Post Meta keywrds.
Second one inside the Head Tag to output Title and meta description of all pages and meta keywords for index page; without the need of a widget. And in case an engine didn't like those meta keywords, you still have the title and description where they should be.

3- After Adding that code , you will get errors when trying to do anything in the 'Page elements' and clicking save. the Only solution is cut Block1 from the template & save, do what you need in 'page elements' & save. paste Block1 back in the template.
It is the only way, until Blogspot pay attention to the issue!

To edit your Blogspot template

Go to Layout > Edit HTML > Check 'Expand Widget Templates', and don't forget to save a backup before you do anything..
Don't forget to remove those comments.
Replace those Static Blog meta tags content with real ones.

how to add meta tags keyword/description to blogger

Using optimized keywords and description in meta tags greatly enhances search engine visibility. To add meta tags to blogger

open your blogger template designer and open html editor
and add the following codes below "<b:include data='blog' name='all-head-content'/>" this line and above "<title><data:blog.pageName/></title>"

<meta content='your keywords separated by commas' name='keywords'/>

 <meta content='your name' name='author'/>

    <b:if cond='data:blog.url == data:blog.homepageUrl'>
      <meta content=write here description' name='description'/>
      <title><data:blog.pageTitle/></title>
    <b:else/>
      <meta expr:content='data:blog.pageTitle' name='description'/>


How to get back links for free

25 Backlinks EverydayYou don’t have to add any reciprocal link to your site. Just submit your form everyday and get free backlinks

Step 1 : Register on www.socialmonkee.com Click Here.

Step 2 : Now you have to ad a Firefox plugin. [Don’t worry they are
providing a guide]

Step 3: As a free member you can get 25 Backlink everyday.
Means 750 backlink per month.

Step 4 : Everyday fill the submission form.

For more You can also trace the backlink because they are provide a
submission report after submission. Most people do not execute this
steps.

Getting backlink is not enough. You have to inform search engine
that you are here.

Step 5: Open your report and copy all that links.

Step 6: Go to Pingfarm. Noe paste that all link and press button of
mass pinging.

Here your job gets finished. Do this things everyday and in this way
you will get free backlinks.

How to remove the Blogger Navbar 2012

To remove the navbar from the blog you can use following simple steps.

Open blogger template designer.

Than go to advanced tab and click 'Add CSS'

Here copy paste code

#navbar {
height:0px;
visibility:hidden;
display:none;
}


Apply to your blog and now the nav bar will be removed from the top of your blog. Enjoy...

How to remove blank space below header blogger

White blank space below blogger header logo that is to be removed.

To remove this space open template > HTML editor

and search for 'titlewrapper' and change the padding value to 0px.

And its DONE...